Roles
1. Click on the left navigation menu and select Roles.
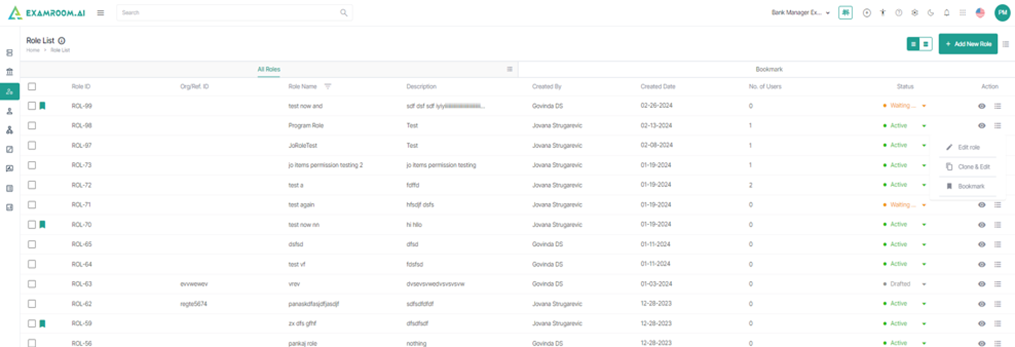
2. The Role List is displayed in the Table View comprising All Roles and Bookmark.

3. Click on the Hamburger Menu at the right of All Roles, to view the Customize Display of the table headers.

4. The user has the option to rearrange any of the table headers to display specific column information as required.
5. The following are the table headers:
- Role ID: The unique ID generated when a new role is created.
- Org/Ref. ID: The organization or the reference ID.
- Role Name: The name of the role created.
- Description: A short description of the role.
- Created By: The information of the person, who created the role.
- Created Date: The information of the date when the role was created.
- No. of Users: The number of users assigned to the role that is created.
- Status: The Status of the role created.
- Drafted: The state in which the role is saved.
- Active: The state of the active role that is used in the system and appears in the dropdown while creating an account for some user or inviting a user. If the role is not active, it is not displayed in the dropdown.
- Waiting for Approval: A state in which a user creates a role that needs to be approved by the Bank Manager , and a notification is sent for the approval to the Bank Manager.
- Inactive: The state in which the start and end date expires or when the Bank Manager chooses to inactivate.
- Action: The choice to Edit, Clone & Edit, Bookmark a role.
6. Select Bookmark, to view the selected bookmarked roles.

7. Like All Roles, click on the Hamburger Menu at the right of Bookmark, to view the Customize Display of the bookmark table headers.

8. The user has the option to rearrange any of the table headers to display specific column information as required.
9. Select Grid View on the top right corner of the page to change the display of the same contents, All Roles.

10. View the grid of the Bookmark.

11. Click on the Hamburger Menu at the extreme right of the Role List, to view the Customize Display for the entire page with either All Roles or Bookmark in the page.

Add New Role
1. Click Add New Role to add a new role.
Note: Add New Role information page is displayed.
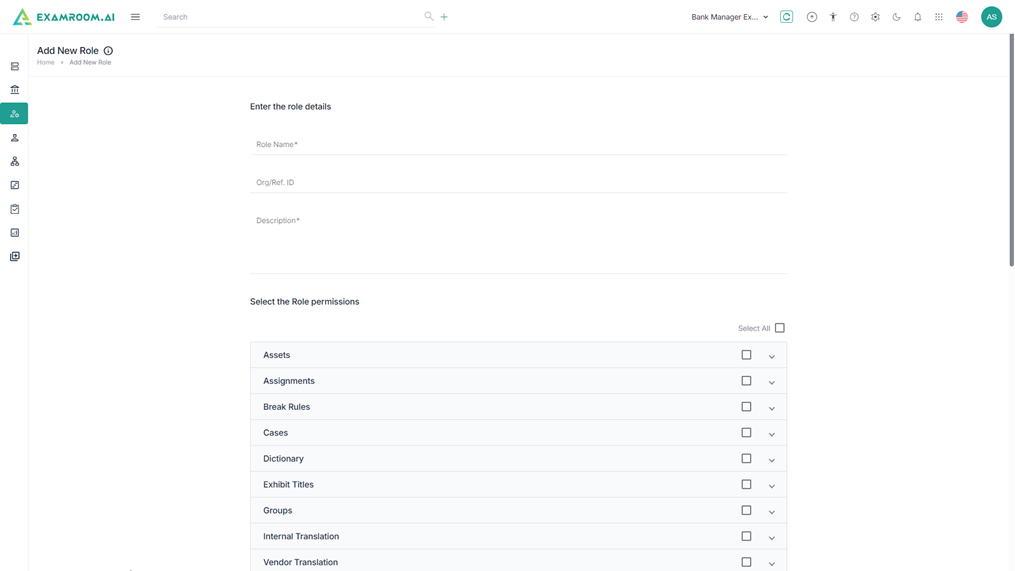
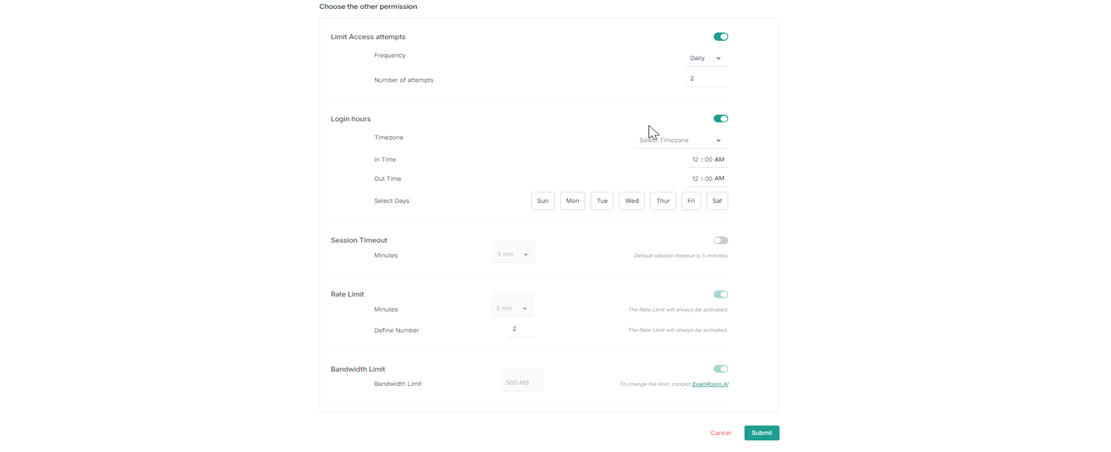
2. Enter the following details in the Add New Role page.
- Enter Role Name, Org/Ref. ID, Description.
- Select the Role Permissions.
- Choose the other permission.
- Limit Access attempts
- Login Hours
- Session Timeout
- Rate Limit
- Bandwidth Limit
3. Click Submit, to submit the entry and Cancel to exit.
4. A success message Role Successfully Created is displayed along with the creation of the new role in the All Roles list.

5. Click View icon, under the table column Action to verify the information of the Role created.
Edit Role
1. Click on the Hamburger Menu of the Action table column.

2. Following is the display of actions:
- Edit Role
- Clone & Edit
- Bookmark or Unbookmark
3. Click Edit Role to edit.
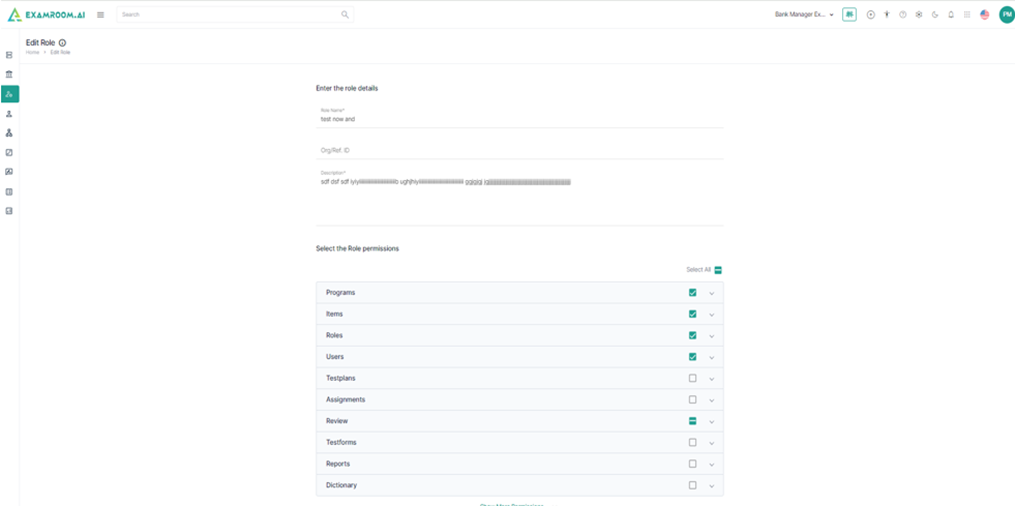
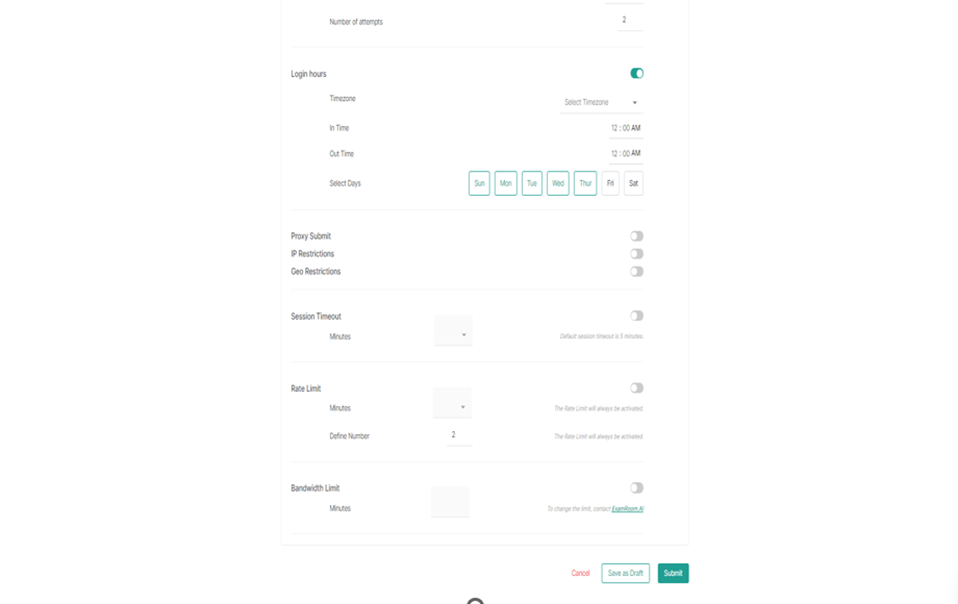
4. Click Submit, to submit the role.
Note: The system does not allow the creation of multiple roles with the same title and permissions.
5. A success message Role Successfully Edited is displayed at the top right corner along with edited role in the list of All Roles.

Clone & Edit
1. Click Clone & Edit from the Role List, to clone the selected Role ID. Then, the Add New Role page appears to make the edits.
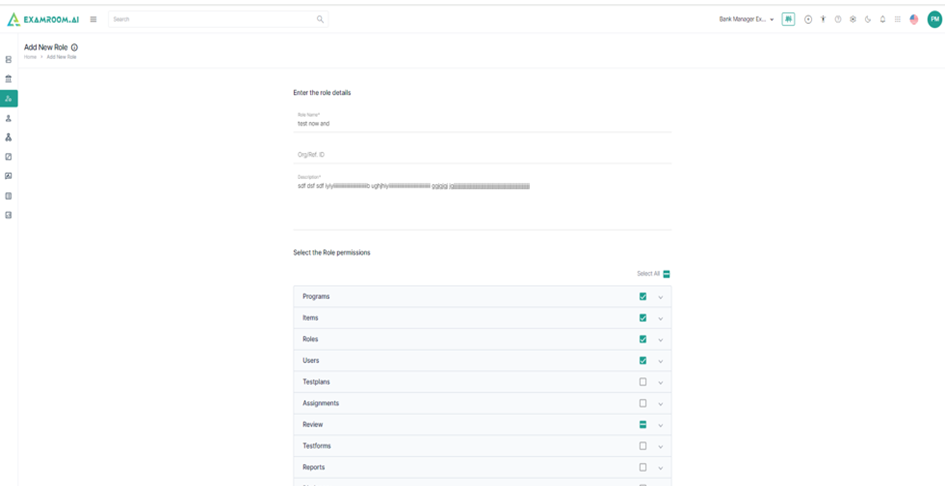
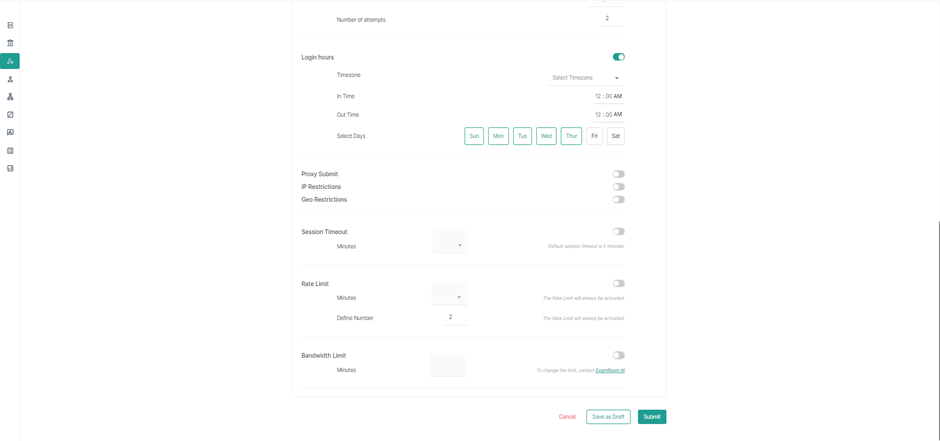
2. Click Submit, after changing the Role Name and completing the desired edits.
3. A success message Role Successfully Created is displayed along with the cloned and edited Role ID.

Bookmark
1. Click on the Hamburger Menu of the Action table column.
2. Select Bookmark, to bookmark the Role ID and to display it under the Bookmark tab.
