Items
1. Click Items menu.
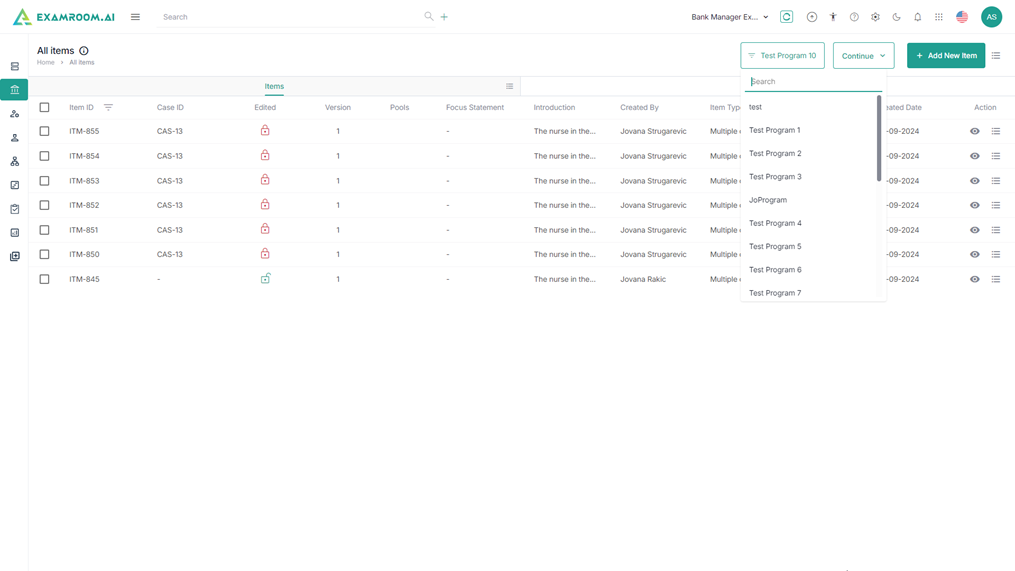
2. Select the Program from the dropdown.
Note: Based on selected program, the system displays the Items in the table view comprising All Items and Cases tab.

3. Click on the Hamburger Menu at the right of All Items, to view the Customize Display of the table headers.
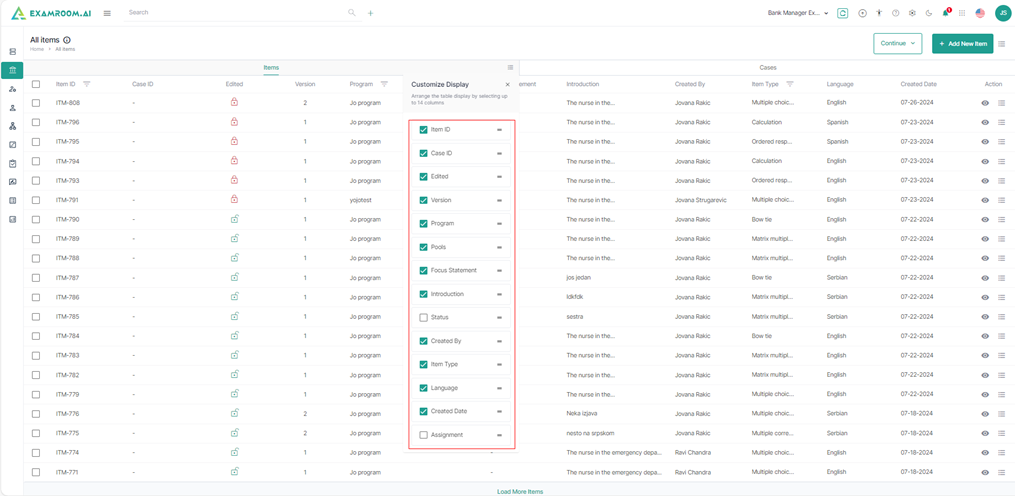
4. The user has the option to rearrange any of the table headers to display specific column information as required.
5. The following are the table headers:
- Item ID: Unique ID of the Item.
- Case ID: Unique ID of the Cases.
- Edited: Item that is edited.
- Green Locker: Represents my items, or items that are finished with editing by other users.
- Red Locker: Represents my items, that are under edit by other users until they finish.
d. Version: Version of the item.
e. Pools: Information on Pool Item.
f. Focus Statement: Statement briefed to an item.
g. Introduction: Information of the item.
h. Status: Status of the item.
i. Created By: Name of the person who created the item.
j. Item Type: Type of the item.
k. Language: Language of the item.
l. Created Date: Date in which the item is created.
m. Assignment: Assignment type of the item.
n. Action: Choice action to be taken on the Item ID.
6. Select Cases, to view items that are sitting in the Cases.

7. The user has the option to rearrange any of the table headers to display specific column information as required.
8. Click on the View icon to see the item in the cases list.
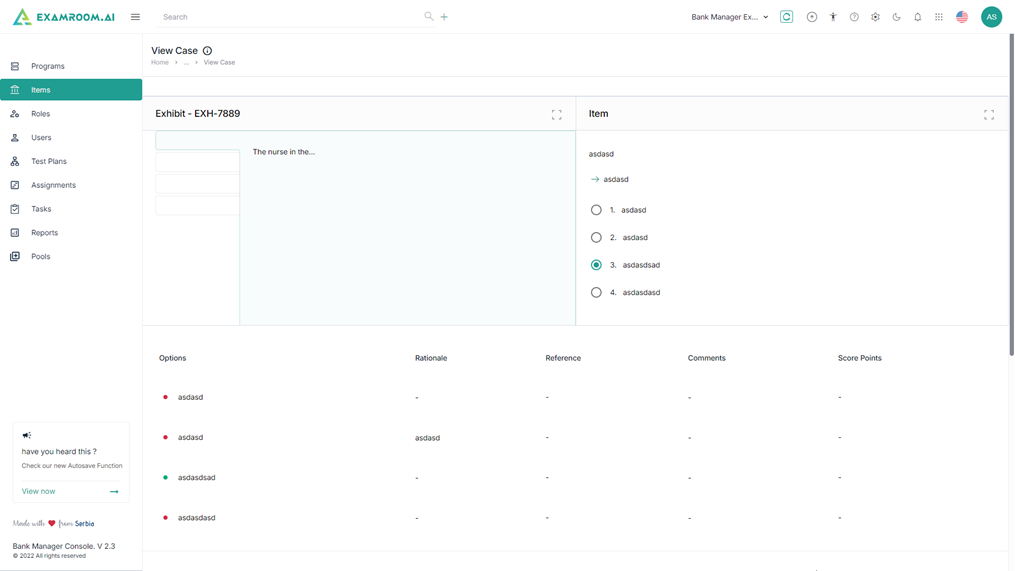
9. Click on the Hamburger Menu of the Action table column.

10. Click Bookmark to bookmark a case.
11. Click Preview Case to view the preview of the Case.
Add New Item
1. On the Items, navigate to the top right corner and click on the Add New Item.

Note: The application displays the Create New Item.
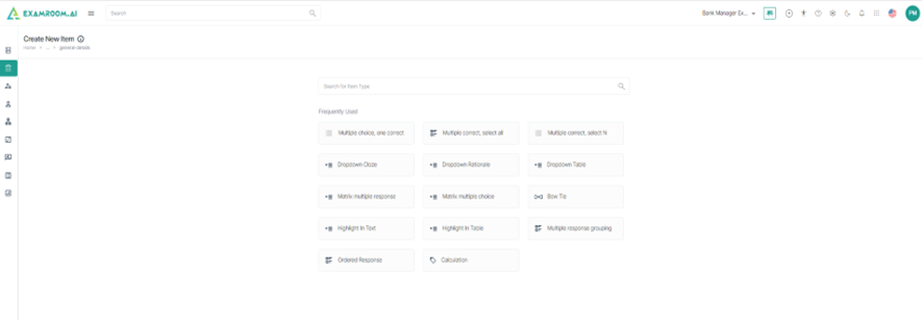
2. Search for Item Type or click on any of the Frequently Used item.
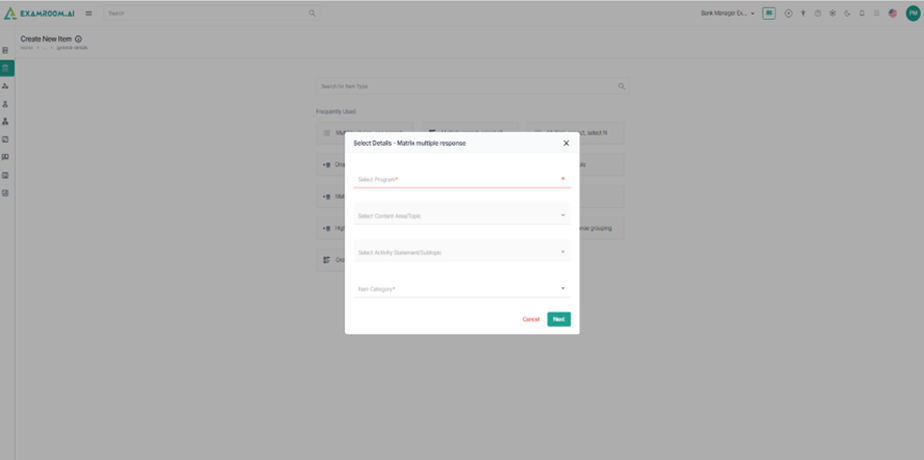
3. Provide the following information as required from the respective dropdowns:
- Select Program
- Select Content Area/Topic
- Select Activity Statement/Subtopic
- Item Category
4. Click Next.
5. Click Step 1 - Create Exhibit and Items and provide the information for:
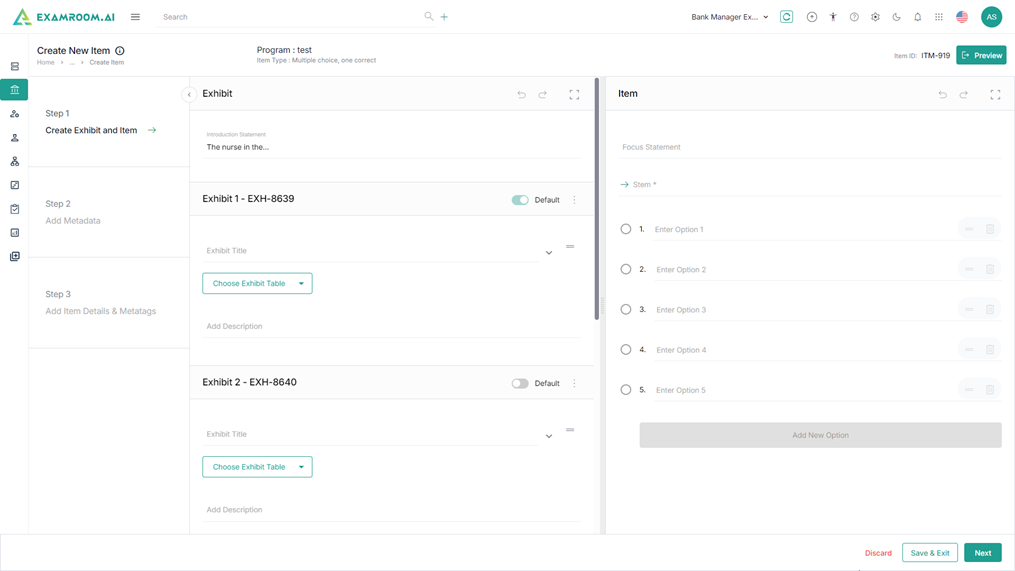
- Exhibit – Introduction Statement.
- Exhibit1, Exhibit 2, Exhibit 3 with Exhibit Title, Choose Exhibit Table and Add Description.
- An option Add Another is provided to add the exhibits .
Note: Add Another option is provided only if the number of exhibits is pre-set in the Item Framework module and user still did not meet the predefined number of exhibits. - Item: Has the Focus Statement with Stem information.
6. Click Next or Step 2 – Add Metadata.
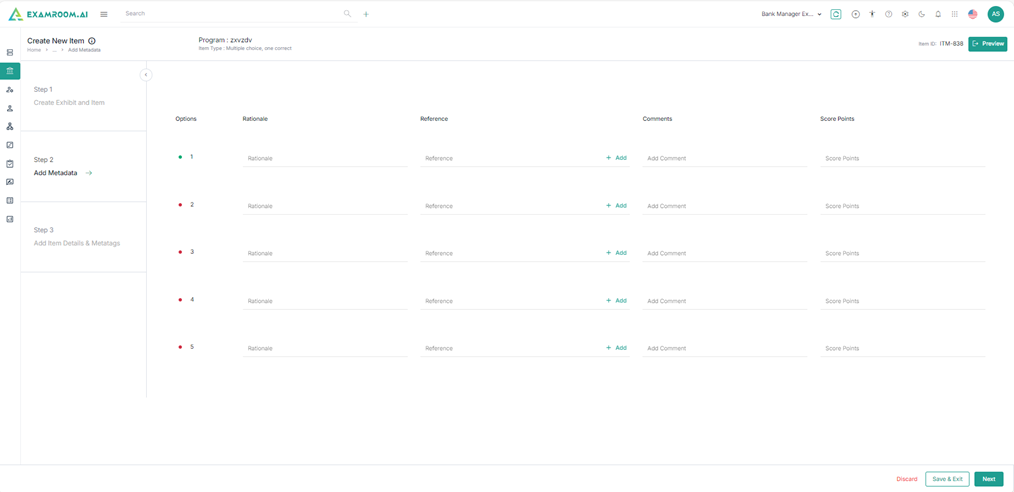
7. Enter the following information for Metadata:
- Options: View the provided answer.
- Rationale: More detailed information for each answer option.
- Reference: Where the answer is referred from (book, journal or URL’s)
- Comments: optional comment left by internal SMEs for better communication on each item.
- Score Points: Entering score points for each answer option given.
8. Click Next or Step 3 – Add Item Details & Metatags.

9. The following is the information for Item Details and Add Metatags for Items:
| Data | Description |
| Clinical Judgement Step | The step in clinical procedure practice. |
| Clinical Judgement Type | The type of clinical analysis. |
| Item Category | The category of an item. |
| Population | The medical branch item is referring to. |
| Item Details | The details that can define items further.
|
| Add Metatags for items | Enter the tags that can define items further. |
10. Click Submit to view the added item in program list.
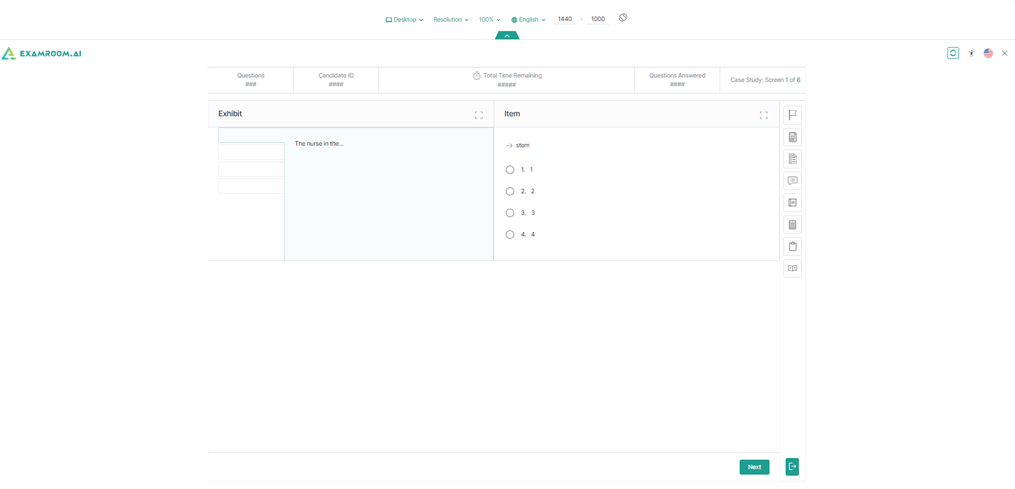
11. On the Create New Item, navigate to the top right corner and click on the Preview to view the item information.
12. Click on the Hamburger Menu at the extreme right of the All Items, to view the Customize Display for the entire pa ge with either All Items or Cases.

Add Item to Pools
1. Select Item from the list.

2. Click Add Items to pools to add the selected items to pool.
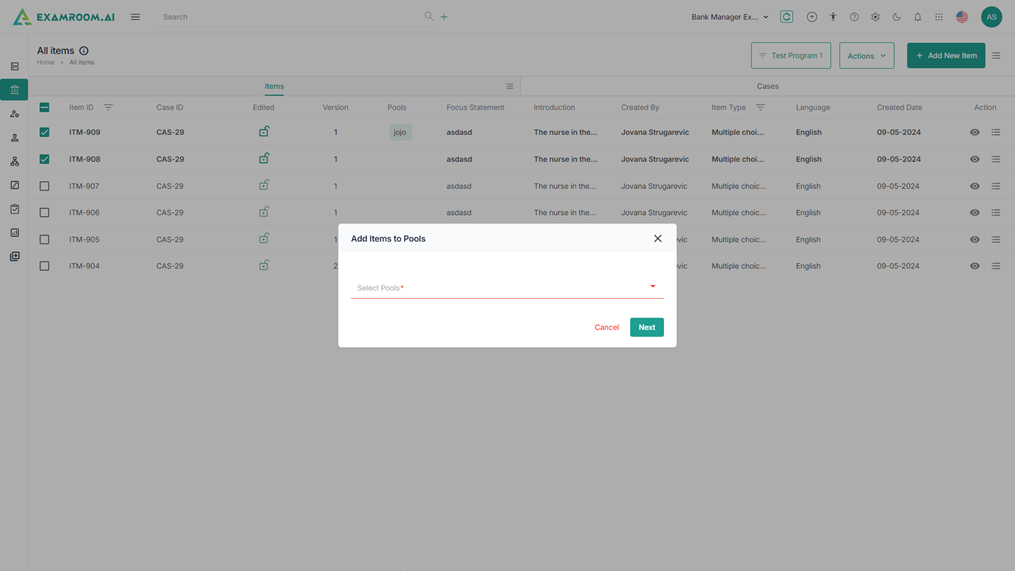
3. Select the Pools from the dropdown.
4. Click Next to add the items to the pool.
Translate Item
1. Select Items from the list.

2. Click Translate under Action dropdown.
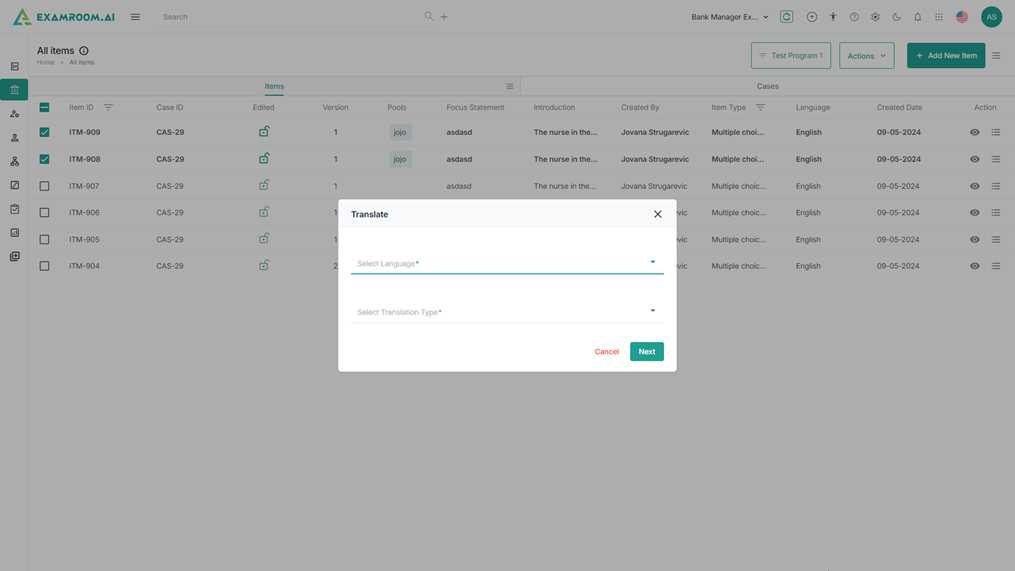
3. Select Language from the dropdown.
4. Select Translation Type from the dropdown.
5. Click Next to proceed for next step.
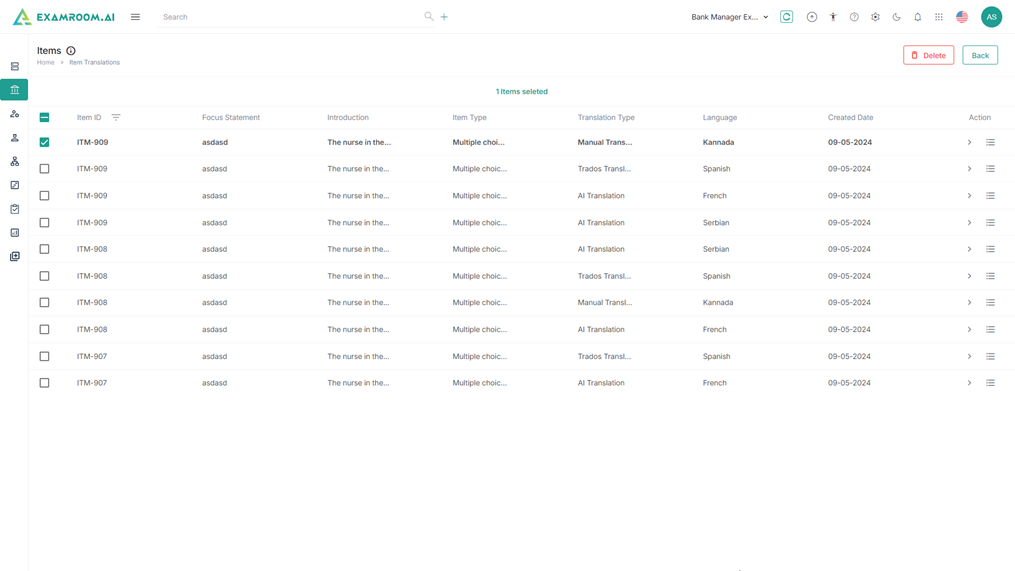
6. Click the arrow under action header to translate the item.
7. Click the Hamburger Menu under action header to Delete the selected item from the list.
Continue
1. On the Items, navigate to the top right corner and click on the dropdown Continue.

2. Select Continue Writing to continue the item writing or Continue Translate to continue the translation of an item.
Note: If the user cancels an item before submitting it, the system will display a red locker icon where the cancelled item will be placed. The user can then choose to continue with the item by clicking the "Continue" button.
1. Select Continue Writing to view the drafted Items.

2. Under the Action table column, select the Arrow button to continue to write or the Bin icon to discard the draft.
3. Click on the Arrow to view the Edit Item.
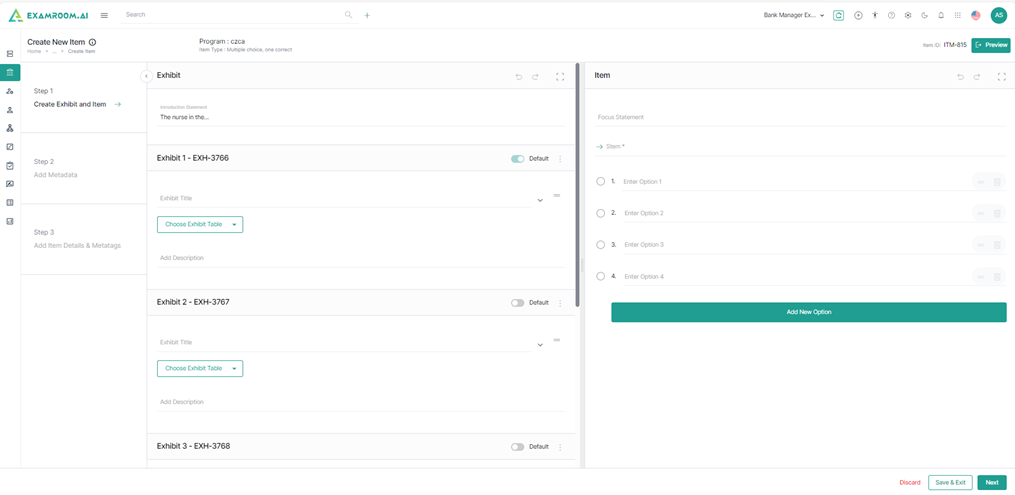
4. Click Step 1 - Create Exhibit Items and provide the information for:
- Exhibit – Introduction Statement.
- Exhibit1, Exhibit 2, Exhibit 3 with Exhibit Title, Choose Exhibit Table and Add Description.
- An option Add Another is provided to add the exhibits .
Note: Add Another option is provided only if the number of exhibits is pre-set in the Item Framework module and user still did not meet the predefined number of exhibits. - Item: Has the Focus Statement with Stem information.
5. Click Next or Step 2 – Add Metadata.
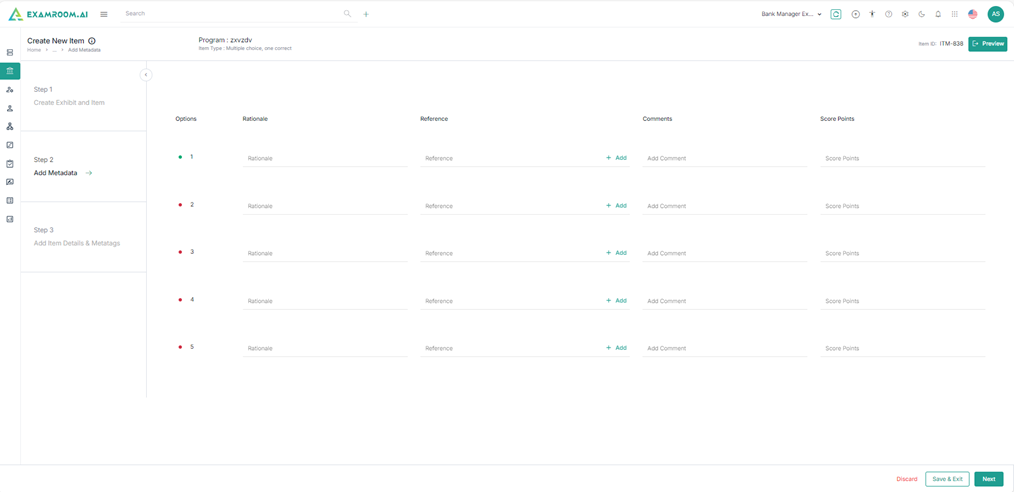
6. The following is the information for Metadata:
- Options
- Rationale
- Reference
- Comments
- Score Points
7. Click Next or Step 3 – Add Item Details & Metatags.
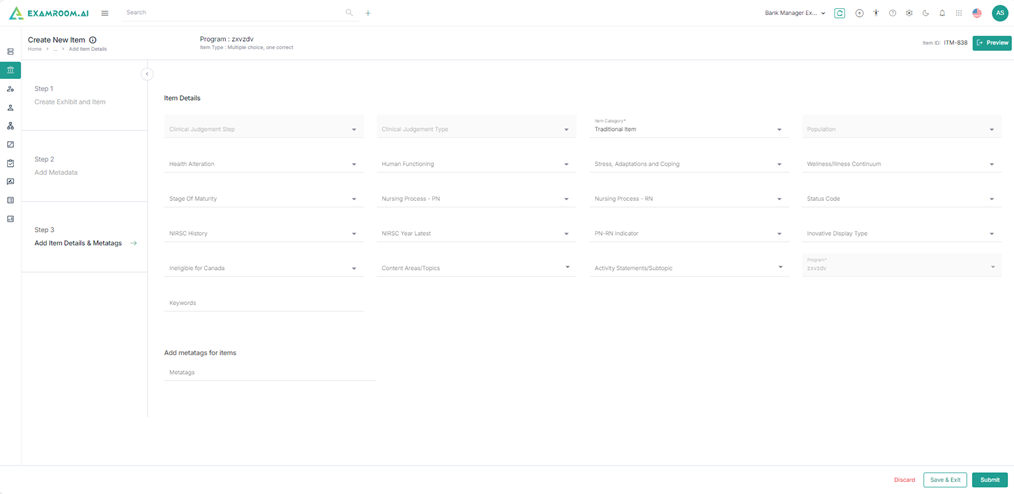
8. Enter the necessary details in Item Details and Add Metatags for Items.
9. Click Submit to view the edited item in program list.
Continue Translate
1. Select Continue Translate to view the drafted Items.
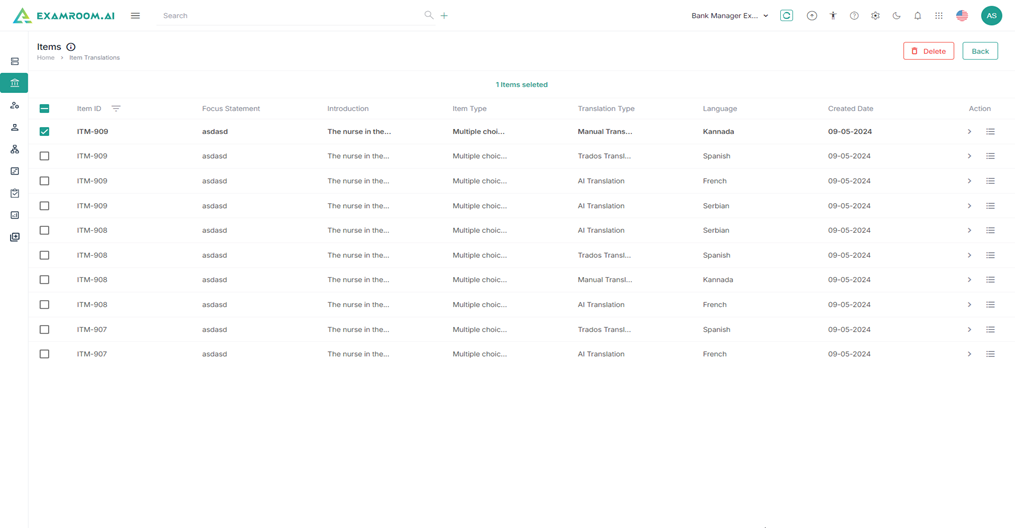
2. Under the Action table column, select the Arrow button to continue to translate or the Hamburger menu and click delete icon to discard the draft.
3. Click on the Arrow to view the Edit Translate Item. – (Screen Short on Hold due to an error occurring in QA Environment)
Add New Cases
1. Click Cases header from the item list page.
2. Click Add New Case at the top right corner of the page.

3. Enter Case Name, Description and select Program, population from the dropdown under General details section.
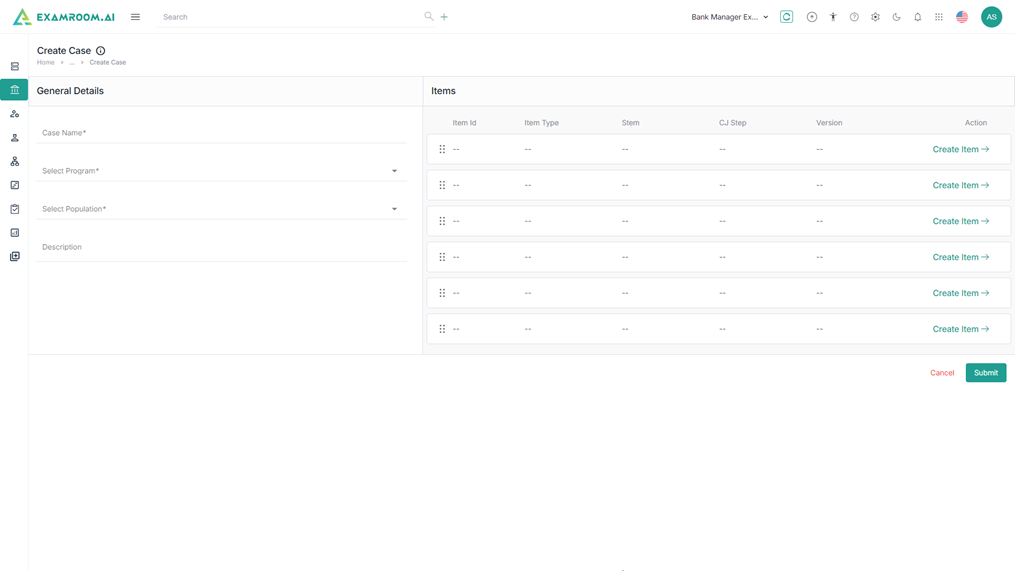
4. Click Create Item under Items section to create an item.
Note: Six Items should be added in a Case. The user needs to add each item individually.
5. For adding new item follow Step 2 to 11 in Add New Item.
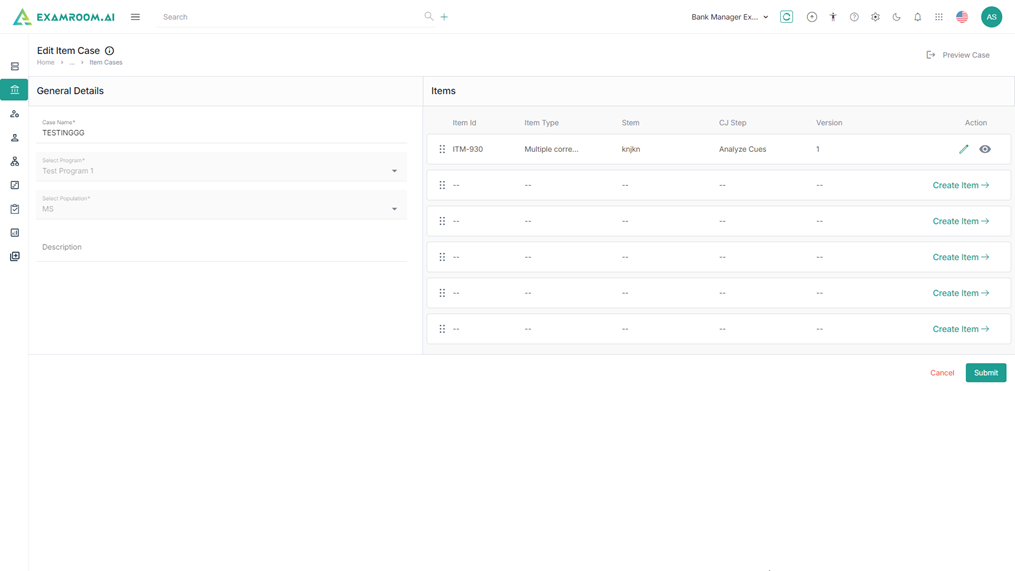
6. Click Edit icon to edit the added item.
7. Click view icon to view the added item.
8. Add the remaining items and Click Submit to view the added case in the list.
