Assignments
1. Navigate to left navigation menu and select the Assignments.
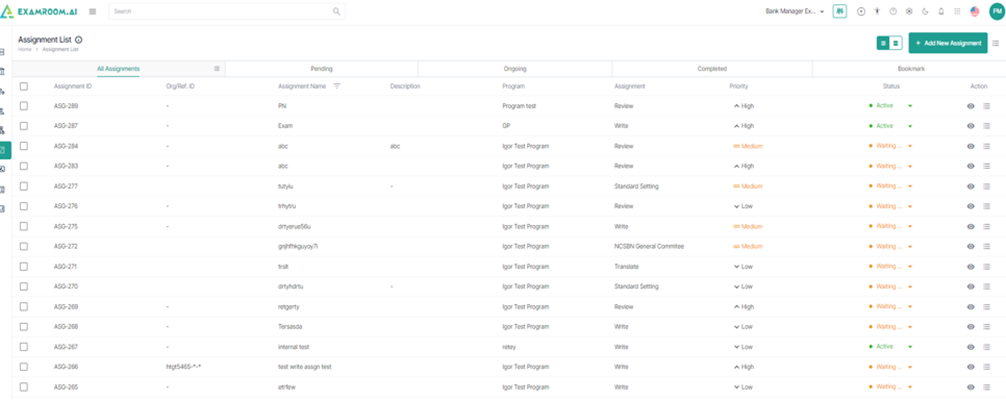
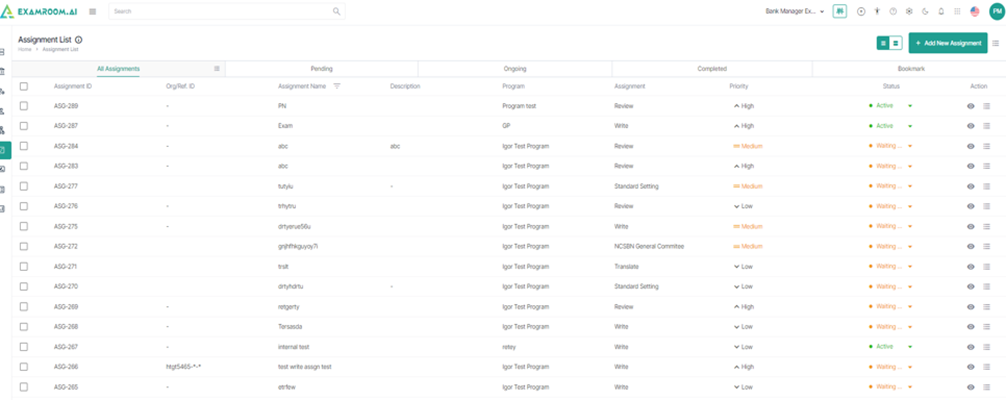
2. The application displays the Assignment List in the Table View comprising All Assignments, Pending, Ongoing, Completed, and Bookmark.

3. Click on the Hamburger Menu at the right of All Assignments, to view the Customize Display of the table headers.

4. The user has the option to rearrange any of the table headers to display specific column information as required.
5. The following are the table headers:
| Data | Description |
| Assignment ID | Unique ID generated when a new assignment is created. |
| Org/Ref. ID | Organization or the reference ID: This is the alternative ID. |
| Assignment Name | Name of the assignment related. |
| Description | A short description of the assignment. |
| Program | The program attached to the assignment. |
| Assignment | A type of assignment. |
| Priority | Severity of the task. |
| Status | Waiting to Start, Active, Waiting for Approval, Rejected, Expired, Inactive, Completed. |
| Action | Provides a choice to Edit, Bookmark, Deactivate, Request for Support, and Reports. |
Add New Assignment
1. Click Add New Assignment to add a new assignment.
2. Create Assignment information page is displayed with Write, Review, Translate, and Rework options.
Write
1. Select Write to create an assignment to write.
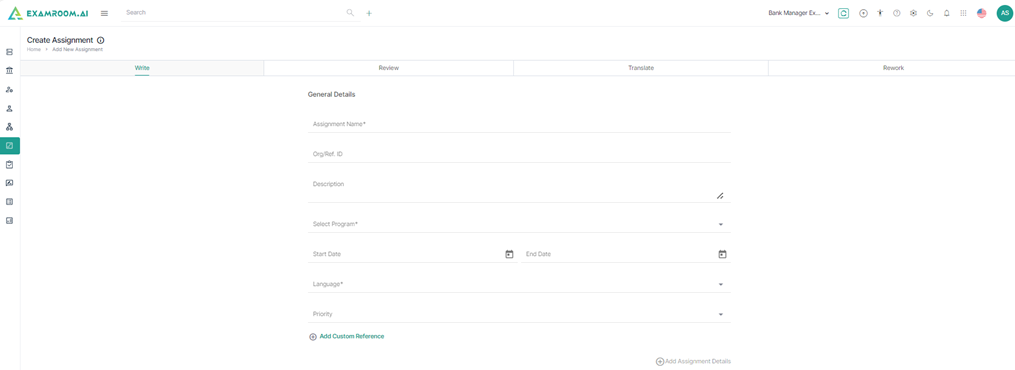
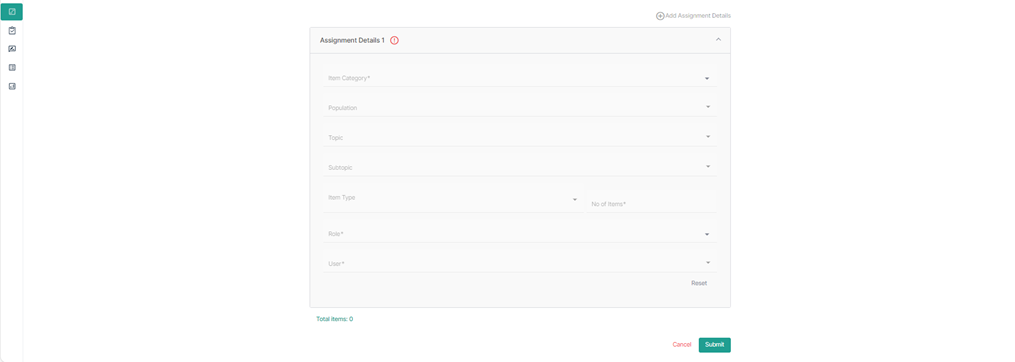
3. Click Submit to view the created assignment in the All Assignments list.

Review
1. Click Review.
2. The essential data for the General Details, Add Items, and Add User Information pages are shown in consecutive order.
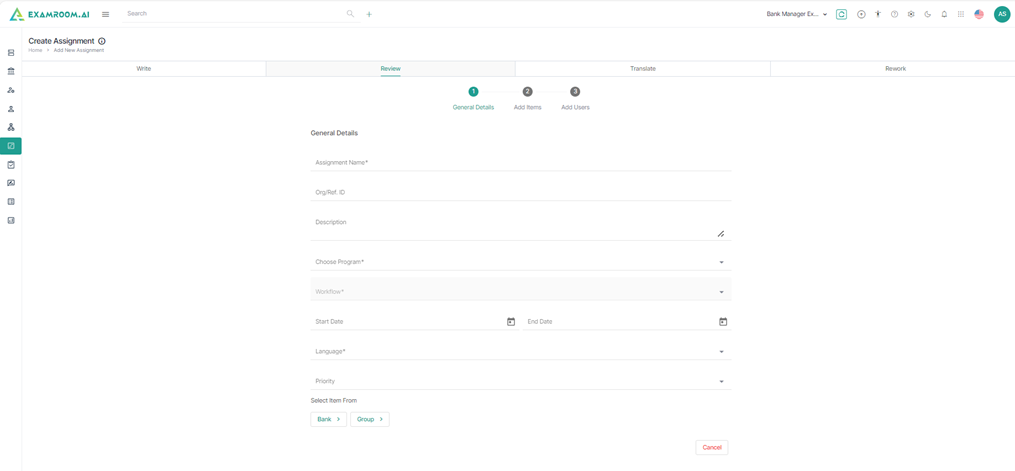
3. Provide the general details and click Bank or Group to select an item.
Note: The user should add items to the bank or create a group of items for the selected program to display them in the item list.
4. Select an Item and click Submit.
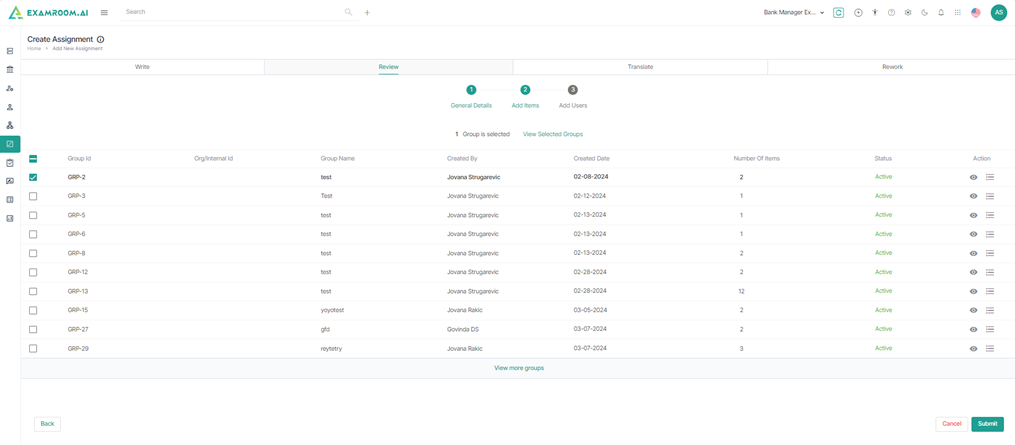
5. The selected Item is displayed. Click the View icon to view the item details or the Bin icon to delete the Item.
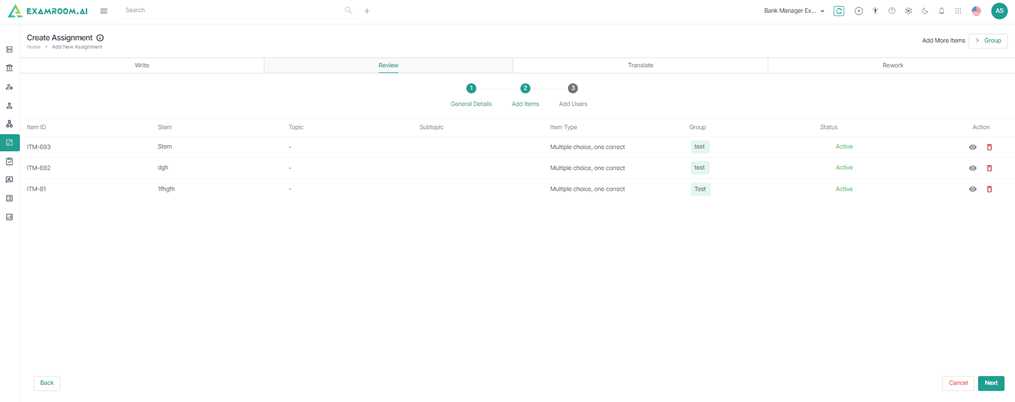
6. Click Next to add the users.
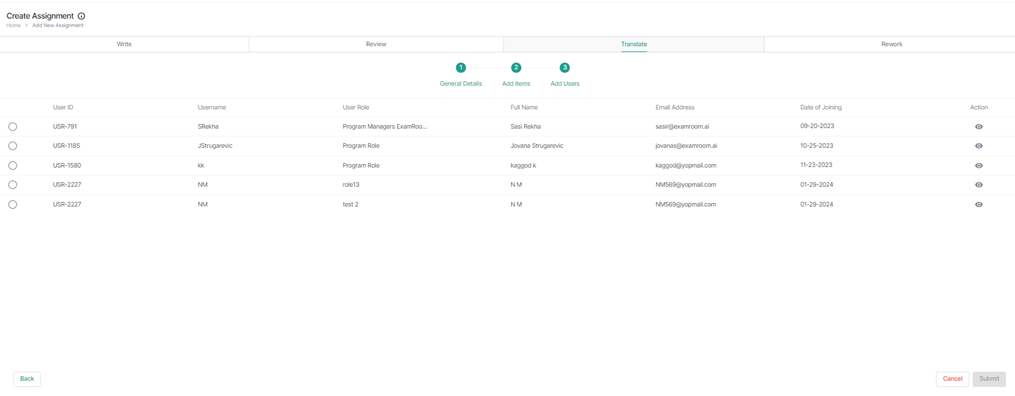
7. Select a User and click Submit.
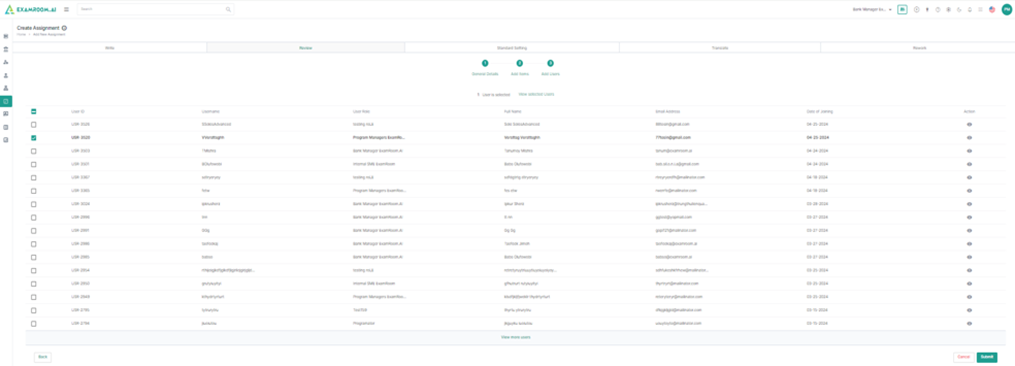
8. Selected User information is displayed

9. Click Create to view the assignment in the All Assignments list.
Translate
1. Click Translate.
2. The essential data for the General Details, Add Items, and Add User Information pages are shown in consecutive order.
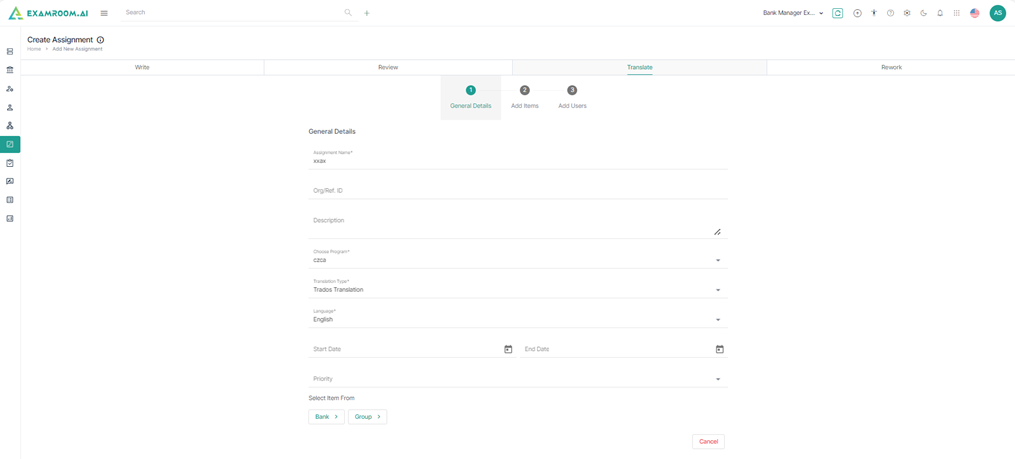
3. Provide the general details and Select Translation type as follows.
- Manual Translation
- Trados Translation
- AI Translation
Note: If "Manual Translation" is selected, an additional field labelled "Workflow" should be displayed, allowing the user to select a workflow from the dropdown menu.
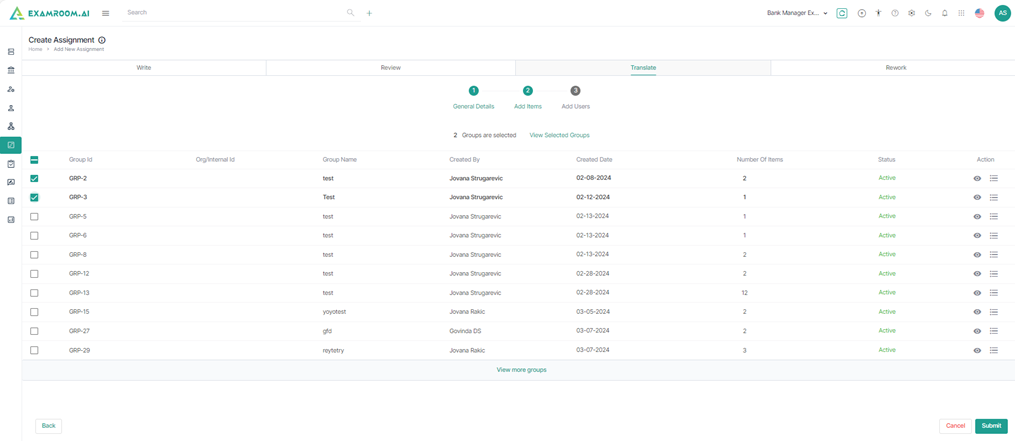
4. click Bank or Group to select an item.
5. Select an Item and click Submit
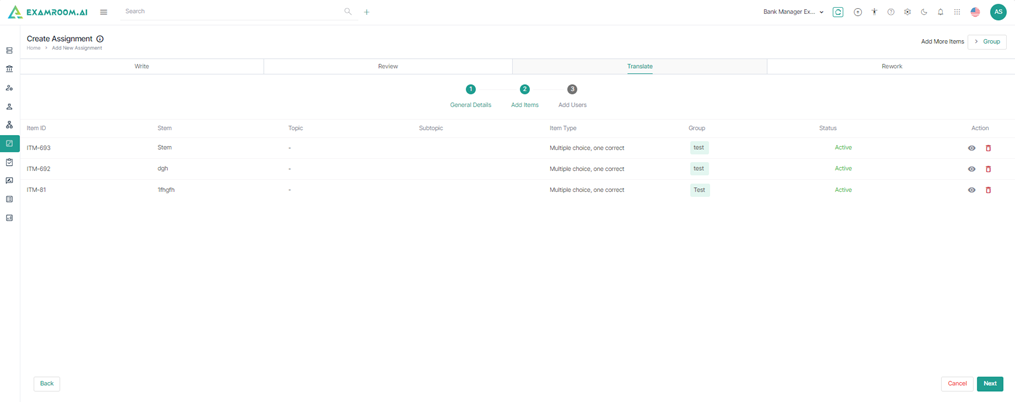
6. The selected Item is displayed. Click the View icon to view the item details or the Bin icon to delete the Item.
7. Click Next to add the User.
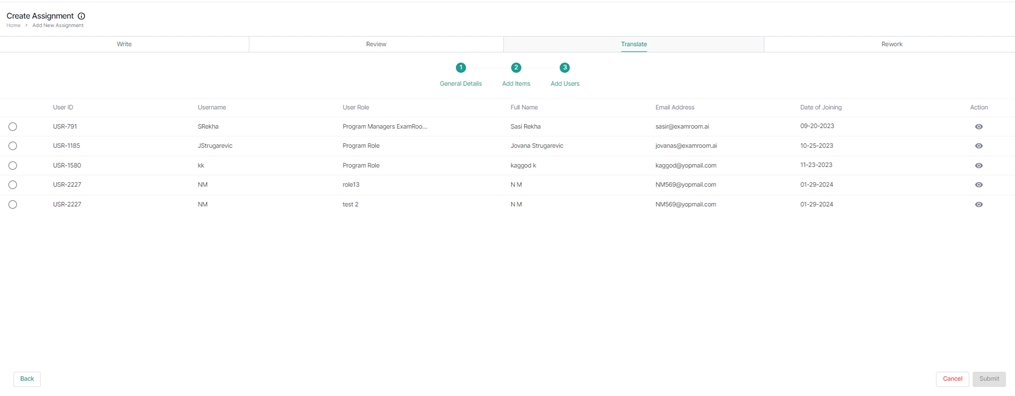
8. Select a User and click Submit.
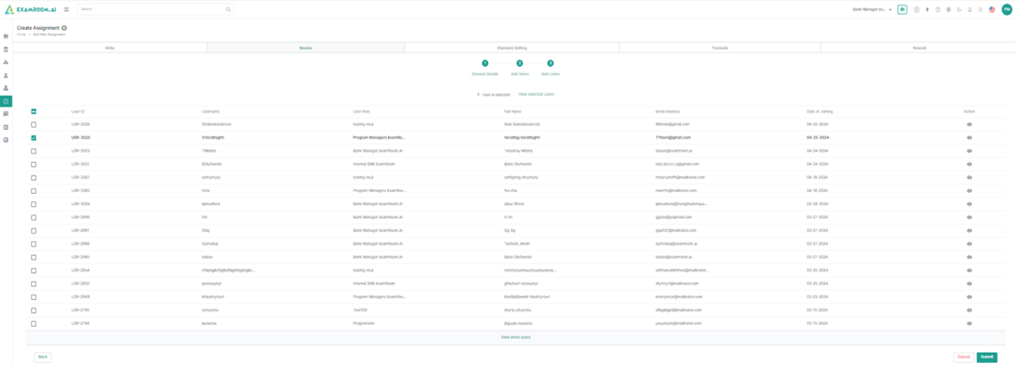
9. Selected User information is displayed.

10. Click Create to view the assignment in the All Assignments list.
Rework
Follow the same steps as TRANSLATE.
